Yarn Beads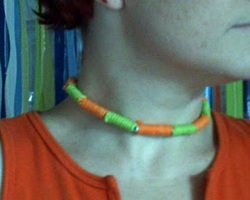 Fun and easy beads made with drinking straws and yarn!
SUPPLIES: *Drinking straws *Yarn *Craft glue (I used Aileen's Tacky Glue) *Wooden Dowels or BBQ Skewers *Old paintbrush, sponge, or makeup applicators *Ribbon (To make necklace) Click the "read more" button to go to the instructions!
0 Comments
Make Stamps from Kid's Drawings!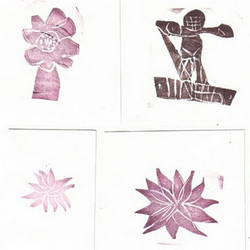 How to make fun stamps from kids drawings!
SUPPLIES: Craft foam, both thick and thin Pencils Sharp scissors Craft knife Glue Click "read more" to go to the instructions! Fireworks Polymer Clay Cane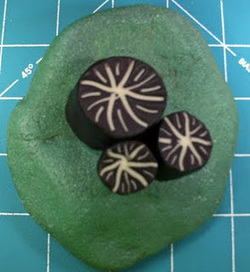 Fire Works! I love watching fireworks, whether it's the pull out all the stops show put on for Independence Day at our local fairgrounds, or the simple fountains we set off in the backyard during a Fourth of July BBQ. This is a cane inspired by those colorful explosions!
This tutorial assumes a basic knowledge of working with polymer clay. The Polymer Clay FAQ at Polymer Clay Central is a good place to start if you are a novice at polymer clay. You need: *Work surface. I like to use a 12X12 marble tile I picked up at the hardware store. *Sharp cutting blade. You can order specialty blades, but I prefer using a wallpaper scraping blade. This might be in part because there is a paint store across the street from me, and I can walk over and grab a new box whenever I need fresh, sharp blades! *Black clay (Or a deep, dark purple could also look very cool) *Glow-in-the-dark clay. I used the classic "white" glow-in-the-dark, but you can also get different colors of glow-in-the-dark. Or you could just go with a bright or fluorescent orange, blue, purple, yellow, etc. *Your HANDS! The most important tool. Click "read more" to go to the instructions Baking Cup Flowers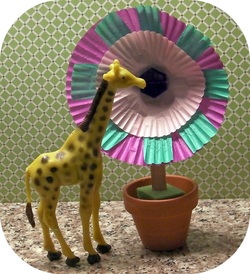 Random giraffe approves of this project! YAY! It's officially spring! Okay, I woke up to a blanket of snow covering the ground, but that's Idaho for you!
But there's nothing like longing for a little spring color, warmth, and cheeriness to inspire a flower project, right? YOU WILL NEED: *Baking cups in pretty colors (the regular and "mini" sizes) *Pop-sickle/craft sticks *Beads *Fishing line *Needle (with a big enough eye for the fishing line) *Scissors *Glue (glue stick and all-purpose craft glue) OPTIONAL: Small clay flower pots and floral foam Click "read more" to go to the instructions! Shamrock Garland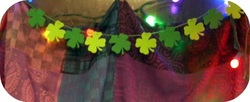 I'm a St. Patty's Day baby, so I rather enjoy decking the entire house in green and shamrocks!
This was a super-simple little garland to make You will need craft foam shamrock shapes, embroidery floss or craft thread, and a needle. Click "read more" to go to the instructions! Felt Finger Puppet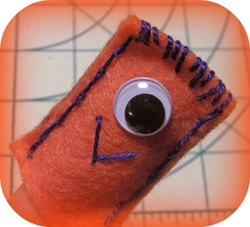 Hi! I'm a friendly orange monster puppet! How-to make an easy finger puppet out of craft felt!
YOU WILL NEED: *A sheet of craft felt (in your favorite color!) *A contrasting color of embroidery floss or craft thread *Needle *Scissors *Marker *Glue *Googly Eye (or eyeS. You only have to make a cyclops if you want to.) Click "read more" to go to the instructions Polymer Clay Butterflies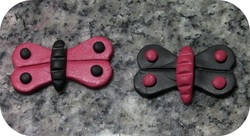 For the last in the series on making making polymer clay bugs with heart shaped cookie cutters: butterflies!
SUPPLIES and TOOLS: *Heart shaped cookie cutter (I used the smaller one for these butterflies) *Polymer clay in black and red (or whatever colors you would like your butterflies to be) *Needle tool *Rolling tool (pasta machine, acrylic roller, rolling pin, fondant roller) *work surface and oven Click "read more" to go to the instructions Polymer Clay Ladybugs (version 2)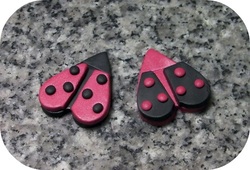 As promised, another version of the heart ladybugs!
SUPPLIES: *Polymer clay in black and red *Heart shaped cookie cutters *Needle Tool *Blade to cut clay with (X-acto knife, wall paper craping blade, tissue blade, polymer clay blade, etc) *Something to roll clay out with (Pasta machine, rolling pin, acrylic roller, fondant roller, etc.) *Work surface and an oven to bake clay in. Click "read more" to go to the instructions Polymer Clay Ladybugs (version 1)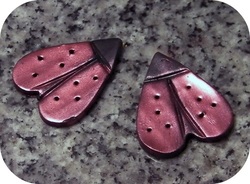 Valentine's Day is just around the corner! Instead of the usual Valentines, this week I'm going to share how to make some cute polymer clay bugs with heart shaped cookie cutters. They can be made into magnets, pins, hair clips, or as a part of a bigger project. (They would be very cute glued to a picture frame, for example!) We'll start off with some shiny metallic ladybugs!
You will need: *Polymer Clay (just black will be enough for this version of the project) *Mica Powder (I used Pearl-Ex brand in Super Russet) *Heart shaped cookie cutters *Needle Tool *Small paintbrush A surface to work on (I use a marble tile I got at the hardware store for about 5 bucks) Something to roll out the clay with (I have a pasta machine that works well and makes it easy, but you can also use a rolling pin, acrylic roller, or fondant roller) And an oven to bake the clay in. Click "read more" to go to the instructions Perler Bead and Paper Pendant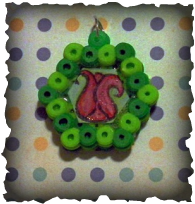 Make a cute and fun little pendant with perler beads, paper, and stamps!
MATERIALS: Perler Beads, Stamps (I used ones that I carved myself,) ink, craft glue, card stock paper, high gloss finish, jump rings TOOLS: Hand drill, iron, ironing paper (parchment paper should work as well,) Hexagonal Perler Bead base Click "read more" to go to the instructions |
By JulieCreativity is fun, so let's start making messes! We'Re MOVING!An upgraded website means I can host ad-free videos!
DIY content will now be posted at: http://creativemovescreations.weebly.com/make-messes This is where the MakeMesses Dot Com address now goes! New content will be posted there, but all the older projects will still be here (MakeMesses Dot Weebly Dot Com) as I slowly do some improving, updating, and posting them at the new website section! Julie's Tip JarBuy your crafter a
cup of coffee or some new art supplies! ;) Project List
All
|
 RSS Feed
